
Adding trim boxes to your home can be a great way to elevate the design, as well as, improve the functionality of a space! In this post, you will see some of our own trim work, and explain why we chose what we did to help you make the best trim decision for your space!
What is the purpose of a trim box?
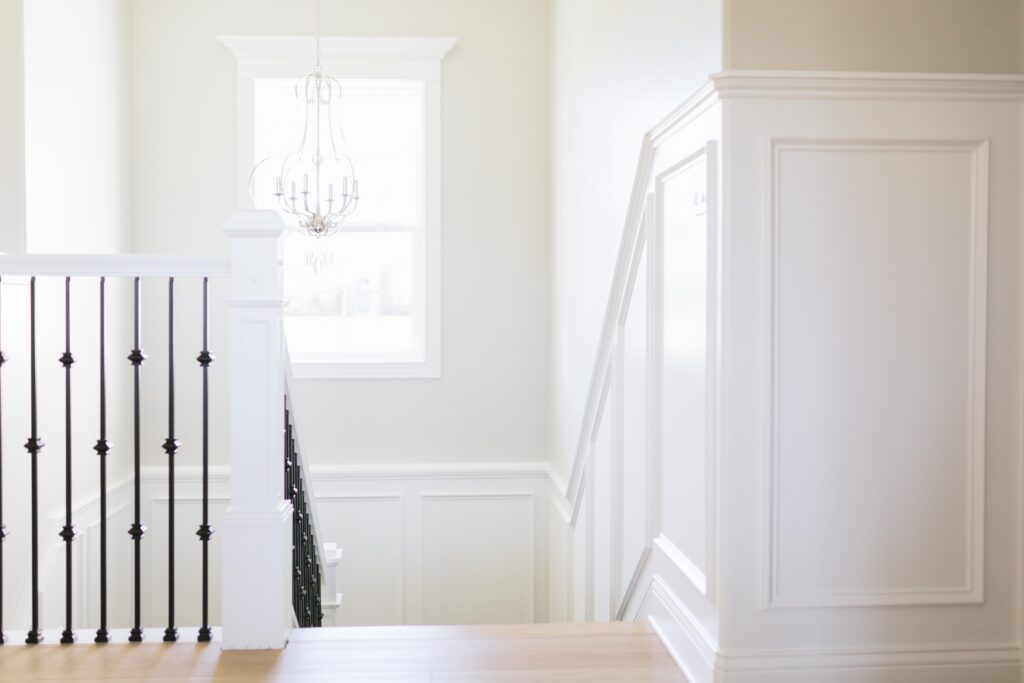
Functional design is one of our favorite things. When you can take something beautiful, and make it functional for a family, that is a great combination! For this client in particular, she was tired of seeing her kids dirty fingerprints all down the stairwell of her steps, and down the main hallway of their home. Kids are kids though, and those dirty hands are not going anywhere! The solution was to create trim boxes as a beautiful design that could have high quality paint that is easy to wipe clean!
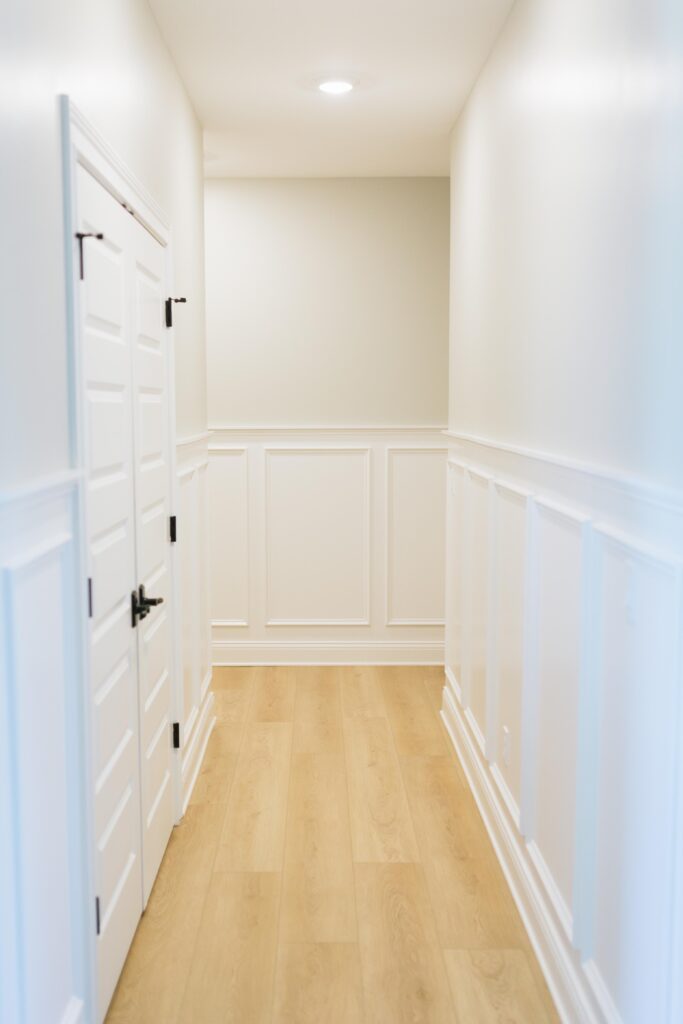
This trim serves a purpose, but it also creates an extension from the baseboards to give a custom look! You could also create a ledge at the top that is slightly longer to give you the perfect spot for a picture ledge or spot to add hooks for jackets and backpacks!
How did you build the trim boxes?
- Start by measuring the space. You will want to choose the height of your top rail and mark that off through the entire area with a level.
- Next, choose the amount of space that you would like around your boxes in the margin. (Above, below, and between) In this case, we used 3.5″. (Standard size of a 1×4 board)
- After that, we took the 1×4 along the line of the baseboard, corners, and top rail line to give yourself a starting board. It should look like a huge rectangle border.
- Once you have the lines in place, you can start on your boxes. Get out your calculator! You will need to determine how many boxes are going to fit in your space evenly to maintain that 3.5″ border. Lets say we have a 91″ area from inside border line to inside border line, and we want to put 3 trim boxes inside of that space, you will have two gaps of 3.5″ each between the 3 boxes. You will take 91-3.5-3.5 to give you 84″ of box space that can be decided by the 3 boxes. Each box will be 28″ from outside to outside. (video come to show the process)
- From the inside edge of your drawn border line (from step 3), measure out and mark your first box with a level and vertical line. Use your 1×4 to mark the space in between, and repeat these steps to finish out however many boxes were going to fit in your space.
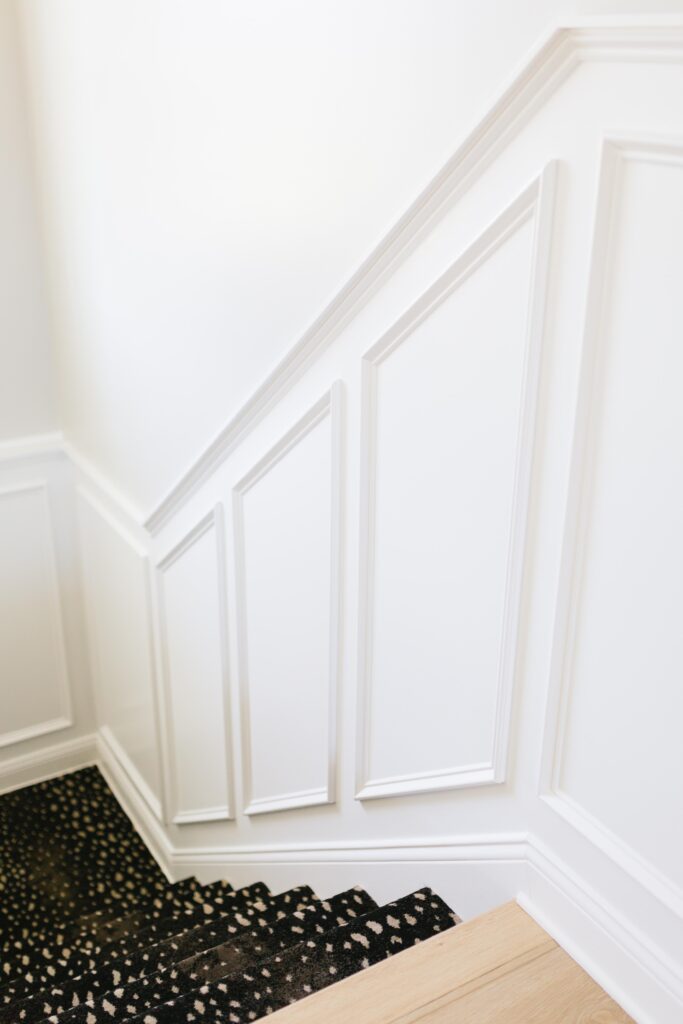
- After you have your measurements, and you have your three boxes drawn on the wall, you can start to cut and hang your trim. For all basic square or rectangle boxes, it will be 90 degree corners with 45 degree cuts. (stairs are more complicated and will require some additional geometry)
- We typically use base cap trim for our boxes, but there are so many different options to fit your style. For this example, we will use base cap installation.
- Hang base cap trim starting with the top piece and left piece first. Nail them firmly into place. Attach the right piece with one nail at the top to allow the bottom of that piece to have flexibility to test the bottom piece. After everything is level and square, you can attach all trim. .
- After all boxes are nailed in place, you will want to focus on the prep work by filling nail holes, caulking, and painting. (See below for more instruction)

What type of paint did you use to paint the trim boxes?
We used Sherwin Williams Pro Classic Semi Gloss trim paint. This color in the pictures is called Pure White. (SW 7005)
To prep the trim, we filled the nail holes with painter’s putty, and caulked with Sherwin Williams caulking.
The paint was applied with a brush and mini roller.
One of our next projects is going to be adding trim boxes to our bedroom. We will be filming that to drop in this post for you! 🙂
…And we know that God causes everything to work together for the good of those who love Him and are called according to His purpose for them. ” Romans 8:28